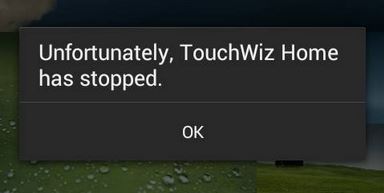
Samsung flagships have enough processing power and system resources to achieve solid benchmarks despite being dragged down by a whole suite of unnecessary bloatware (for the most part) and a launcher that has clear limitations. However, if we go down Samsung’s product line in the low-to-medium range, it becomes obvious that their performances are seriously affected by bloatware and launcher instability. TouchWiz is Samsung’s proprietary front touch user interface. Although it might seem might seem efficient with system resources due to its simplistic design, sadly that’s not the case. In addition to demanding more resources than the stock Android launcher, it has some design flaws that frequently makes it lag behind and become unresponsive. If you’re a Samsung owner, there’s a high chance you’re familiar with TouchWiz’s force stop errors. These errors are not restricted to one particular Samsung model and can be found on all devices running with this touch interface, although the frequency is smaller on flagships. For the most part, there are two variations of TouchWiz errors. “Unfortunately, TouchWiz Home has stopped” and “Unfortunately, TouchWiz has stopped”.
Regardless on which error message you’re getting, the root causes for the two issues are roughly the same:
TouchWiz glitches with old data and cache after an OS update.TouchWiz needs more system resources and becomes unresponsive.Conflicting 3rd party app.A glitched widget is causing TouchWiz to force stop.Inability to allocate enough resources for gestures and motions.
Now that we know the causes, let’s see how you can make the error go away. To make sure you cover all the troubleshooting aspects, please follow the methods below in order until you come upon a solution that works for you.
Method 1: Clearing data and cache for TouchWiz Home
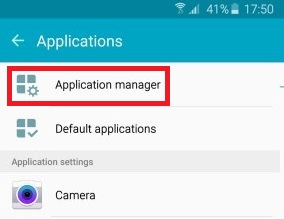
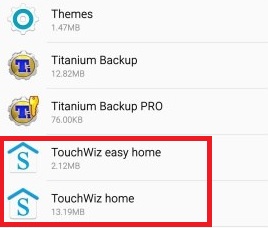
Most manufacturers make their devices to delete cached data from previous versions after updating the Android operating system, but not Samsung. A lot of users have reported that their TouchWiz interface has started displaying errors after upgrading the Android version to Lollipop, Marshmallow, or Nougat. Aside from the glitch provoked by the system update, TouchWiz can break down because of cache data accumulation. In addition to making your launcher unable to keep up with your actions, TouchWiz might become unresponsive and display the “Unfortunately, TouchWiz Home has stopped” error. Another clear indicator that you need to remove the cache from TouchWiz is if the error is displayed when you’re trying to move apps inside TouchWiz’s interface. Regardless your device’s symptoms, the following steps are always the first logical actions. Here’s what you need to do:
Method 2: Disable Motions & Gestures
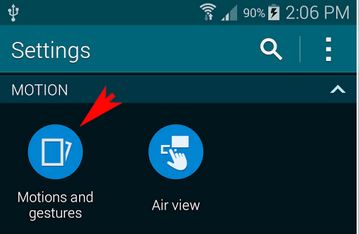
Motions and gestures are known to glitch in some versions of the TouchWiz interface. Although this is less common on the latest models, older Samsung iterations that have modest specs will frequently encounter this issue. That’s even more true with devices running an Android version older than Marshmallow.
Method 3: Soft Reset your device
If you’ve cleared the cache and disabled motions & gestures without a result, let’s assume the error appears as a result of a software glitch. A lot of times, a soft reset followed by draining the capacitors’ stored electricity will refresh your phone’s memory and the error will stop appearing. Depending on how your device is built, the steps are a little different. If you have a device with a detachable battery, here’s what you need to do: In the event that you’re working with a newer Samsung model that doesn’t have a detachable back case (S7 or S7 Edge), here’s what you should do:
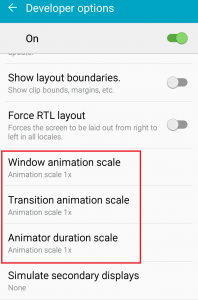
Method 4: Changing the Animation scale
In some cases, making TouchWiz reconfigure its animation scale might eliminate the error message. One of the things you can do is change the animation scale. Here’s how:
Method 5: Switching to Easy mode
Easy Mode is designed to streamline the user experience even further by removing some complicated features that might clutter the screen and add to the confusion. Some users have reported that switching to Easy Mode and switching back to standard mode will remove the “Unfortunately, TouchWiz Home has stopped”. Here’s how:
Method 6: Eliminating software conflicts
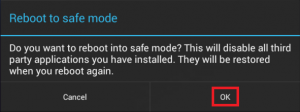
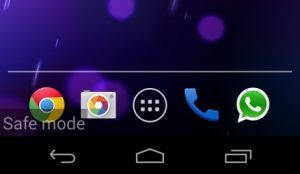
If the methods above didn’t make the error go away, it could be that the TouchWiz interface is conflicting with a 3rd party app you recently installed. The chances of this happening are even higher if you have an inactive 3rd party launcher or a clipboard app like Enhanced Clipboard. A clear way to establish if TouchWiz Home is conflicting with 3rd party apps is to boot your device in Safe mode. While in Safe Mode, your device will be stopped from loading 3rd party apps and processes, so if the error doesn’t repeat it’s clear that a 3rd party software conflict is to blame. Here’s what you need to do: If the error reappears move over to Method 7. However, if the error is gone, it’s time to figure out which app or widget is causing the issue. Here’s how:
Method 7: Wiping the cache partition
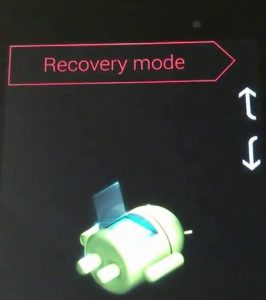
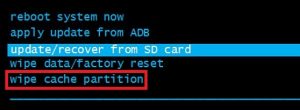
If you’ve come this far without results, it’s time to apply a universal fix that solves most software related glitches. In the event that TouchWiz’s message originates from Samsung’s firmware, wiping the cache partition might make it go away. The procedure might slightly differ from device to device, but for the most part, the steps of wiping the cache partition are the same on most Samsung devices. If the steps described below won’t take you into Android’s system recovery, do an online search on “how to wipe cache partition + YourModel”
Method 8: Doing a Master Reset
Now that we’ve burned through almost all of the available fixes, there’s one last thing you can do before sending your phone for a re-flash. A factory reset will restore your phone to its factory state. In most cases, this will make TouchWiz resume its normal functionality. Before you go through it, it’s important to realize that a factory reset will delete any of your personal data and account information that isn’t on your SD card. For the sake of avoiding unnecessary data loss, the steps below will include creating a backup. Here’s what you need to do:
