Full brightness also consumes much more power and thus, decreases battery life. We have listed down all the methods through which you can change your screen brightness in Windows 10. Take a look!
Method 1: Using your Keyboard
Some keyboards have shortcut keys available which let you change your brightness directly without opening any other tools/applications. Mostly, the key “Fn” + a brightness icon present at the top of your keyboard can be used to change your brightness. Here is an example for a keyboard which supports changing the brightness directly. Press both, the Fn key and the hotkey simultaneously. Press the “Brightness +” button to increase the brightness and the “Brightness –“button to decrease.
Some keyboards have an additional key which locks the function of Fn and doesn’t allow the function to be completed. You have to un-toggle the “Fn lock” for the function to be available. After unlocking the function, follow the normal steps to increase or decrease the brightness.
Method 2: Using Power Icon
Windows 10 has an option where you can check details about your battery percentage, enable Power Saving mode and adjust the screen brightness. This is a very easy-to-use tool where technicalities will be avoided.
Method 3: Using the Action Center
Windows 10 introduced an Action Center where you can find your application notifications as well as different tools to help you access quick settings on your computer. The action center also pertains all the past notifications until you clear them manually. This is very useful if you missed some notification and want to revisit it later on. We can also change the brightness using the action center.
Method 4: Using Display Settings
You can also change the brightness settings using the Settings application. This method is particularly useful if you don’t want to set the brightness level to the ones already defined. This method includes a slider from where you can easily set the level according to your exact need.
Method 5: Using Power Options
You can also change your brightness similar to method 4 using the power options. We will discuss how to set specific brightness levels for different plans in method 6.
Method 6: Using Edit Plan Settings
Windows has a feature where you can predefine brightness values for each power plan you have in your computer. Power plans are configurations which define the way your computer performs, for example, in Power Saver plan your computer will maximize your battery life but at the expense of some performance drawbacks. We can change the brightness settings in the Power Plan settings for each profile. Whenever you switch to another power plan, the predefined brightness value will be implemented. This is a very handy feature saving you the hassle to change the brightness settings each time you switch.
Method 7: Using Advanced Power Settings
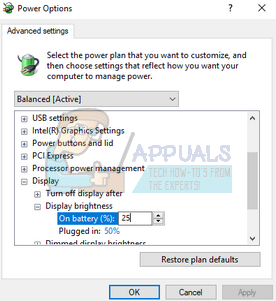
If you prefer setting percentages for each power plan, you can use the Advanced Power Settings. These settings allow you to set the predefined brightness value for both the cases (On battery and Plugged in).
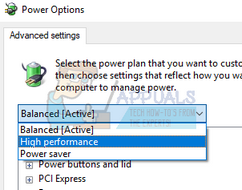
Note: You can also change the brightness settings for other plans by clicking on the current plan present at the near top of the window.
Method 8: Using PowerShell
You can change your current brightness directly from PowerShell as well. This method is convenient if you want to set your screen brightness to a specific percentage but don’t want to open so many menus to do so.
(Get-WmiObject -Namespace root/WMI –Class WmiMonitorBrightnessMethods).WmiSetBrightness(1,
Step By Step Guide to Adjust Brightness after Upgrading to Windows 8.1How to Adjust the Display Brightness in Windows 11Surface Laptop 3 Reportedly Suffering Black Screen Issues At Lowest Brightness…Early OnePlus Nord Screens Suffering From Purple-Colored Screen Tint and Other…


