In Windows 10, every folder is optimized for one of the following templates:
VideosPicturesMusicDocumentsGeneral Items
Typically, Windows will automatically detect the contents of a folder and will adjust to the proper template. If a folder contains mixed files, Windows will use the General Items template. However, if there’s an overwhelming number of files that fit into one category, Windows will go with the large majority. The good thing is you can set the template for any folder manually. Each template is designed to accommodate a certain type of file. The elements affected by template changes are customized views, columns, sorting orders and various file groupings. Folder templates haven’t changed much since Windows XP and the steps of customizing them is fairly similar across new and older versions of Windows. However, the methods featured below where only tested on Windows 10. Follow our tutorials below with step-by-step instructions on how to change and configure templates in Windows 10.
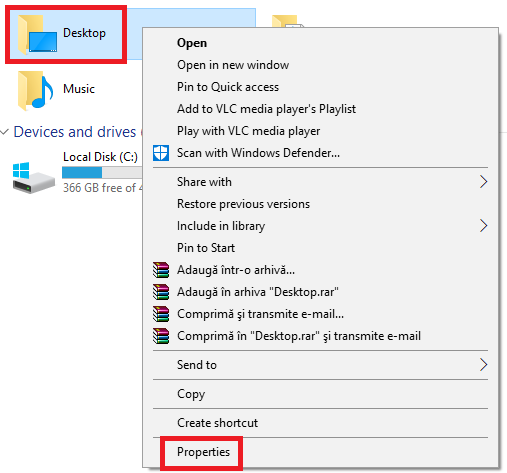
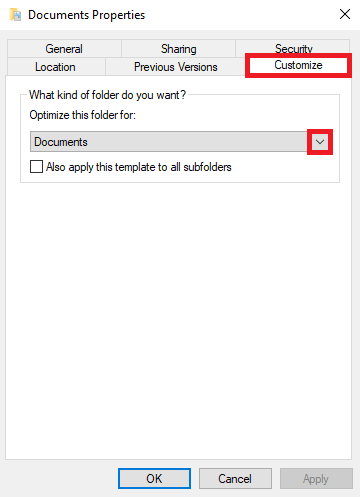
Method 1: Changing the Templates of Folders or Drives
Note: If you’re working with a Windows tablet, long-press instead of right-click.
Note: If you want your selection to apply to subfolders, check the box next to “Also apply this template to all subfolders”.
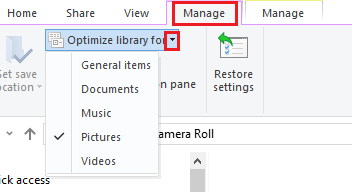
Method 2: Changing the Template of a Library
By default, all the folders present in a library automatically share the same view settings. This means that when you change the template style of a library, your preference will be applied to all the folders in the library.
That’s all!


